Import of data from TLS/OC3/DAE/OBJ formats to DB3D format |


|
|
The program is intended for importing data of 3D models from TLS/OC3/DAE/OBJ formats to DB3D format. The TLS format is a binary file that stores the coordinates of textured 3D models with support for detail levels, the models have a tile structure. TLS format was developed by Agisoft company and implemented in the Agisoft Photoscan product. With TLS format, the Sputnik software of the GeoScan group of companies operates. OC3 format is a binary file which stores the coordinates and color for points, which are combined into tiles distributed by detail levels. The OC3 format was developed by Agisoft company and implemented in the software product Agisoft Photoscan. DAE (COLLADA) format stores a 3D model, the parameters of which are described in the xml file. If the model has textures, they are stored in graphic files, which are usually located in a separate directory. The model in OBJ format consists of a set of text and graphic files. Text files with the .obj extension contain a description of the model's geometry, files with the .mtl extension contain a description of the model's materials, as well as paths to graphic files if the model has textures. Format DB3D is a file of database SQLite 3.0 and above, where in the form of tables the description of 3D models on the terrain is stored. Viewing models together with a map is possible in the task "Navigator 3D", the degree of models details depends on the scale of the display.
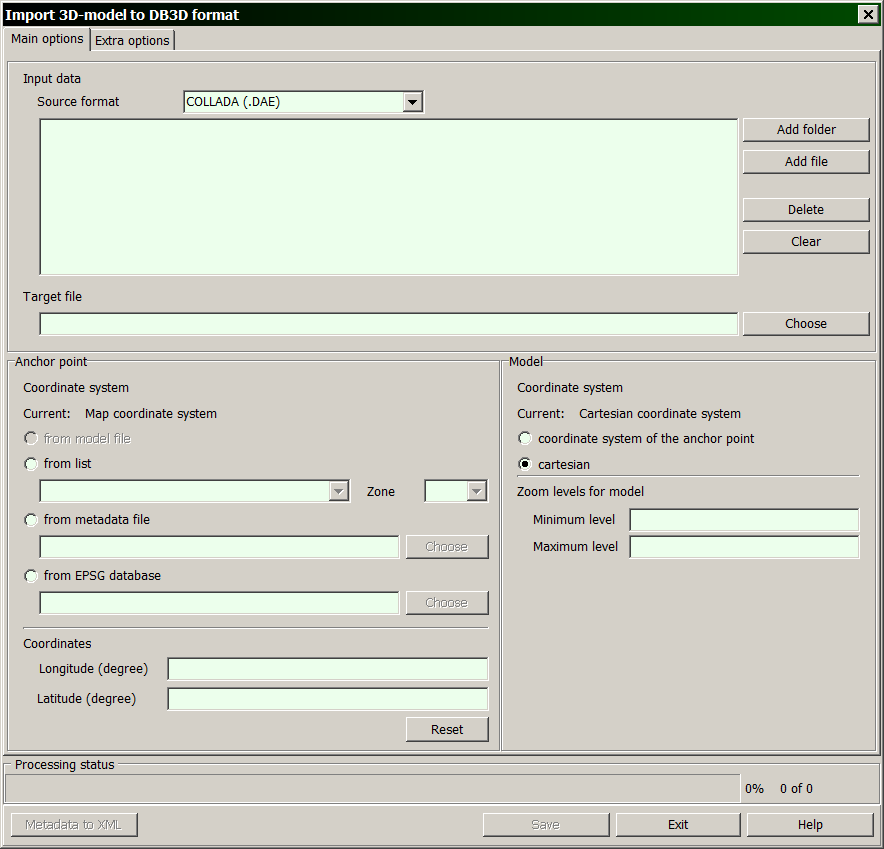
For starting the program of import it is necessary to perform the following actions:
1) Select format of the source model TLS, OC3, or COLLADA (DAE) or OBJ;
2) Select the location and specify a file/files or a directory of the source model.
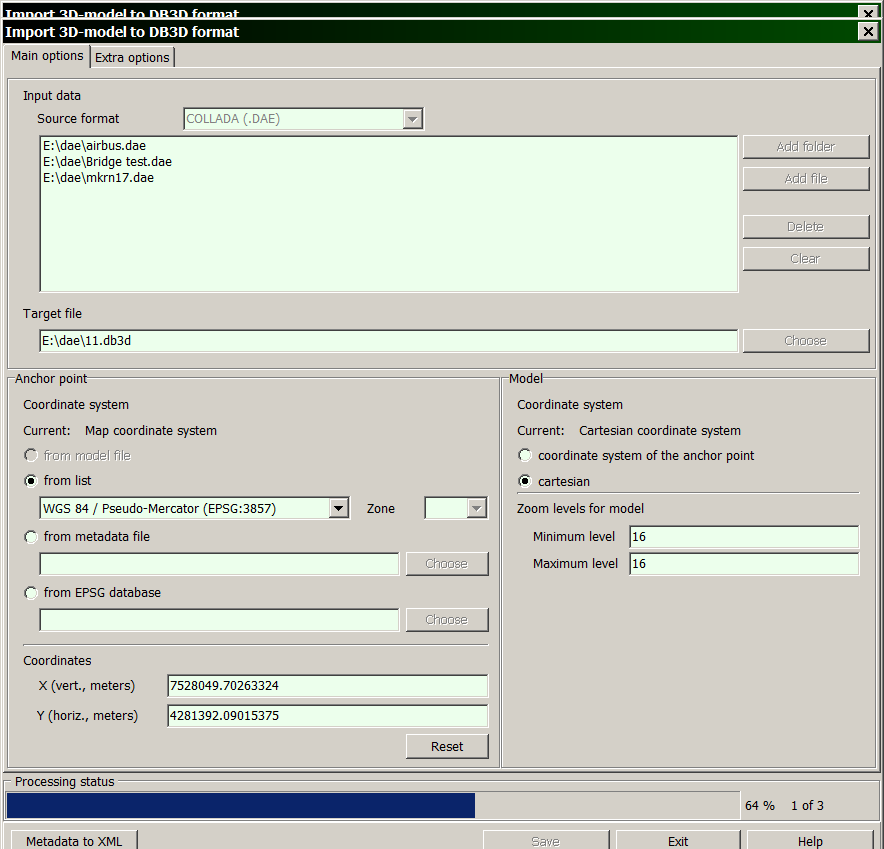
3) Select the location and specify the target DB3D file, if it already exists, or specify the name of a new DB3D file, then it will be created. If initial and target files are chosen correctly, fields «Model geographic location coordinates» and «Zoom levels for model» will automatically be filled and «Save» button will be enabled.
4) Click the «Save» button.
If a previously non-existent DB3D file is specified as the output one, it will be created after clicking the «Save» button, its creation will take some time. The duration of the import process depends on the number of zoom levels loaded, the number and size of textures, the geographic area of the model and can take from several seconds to tens of minutes.
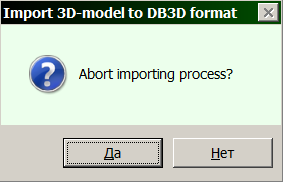
You can abort the process of importing data by clicking the «Exit» button directly during the performing.
Upon completion of the import process, the «Metadata» button is activated, by which you can call the appropriate dialog for editing and saving model metadata into an xml file.
Enhanced setting
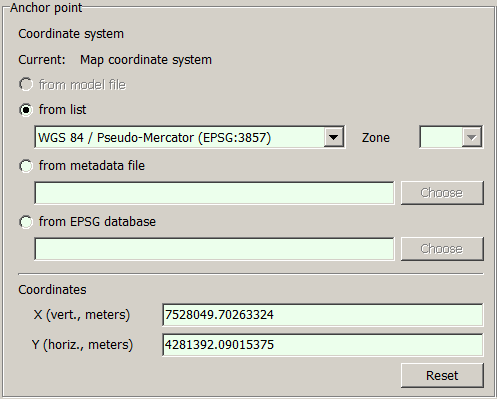
Model geographic location coordinates:
When importing from COLLADA (DAE) and OBJ formats, the choice of coordinate system of model geographic location is available if it is not specified in the source file. Options of selecting a coordinate system of model geographic location:
1) From the list. The following coordinate systems are available:
- WGS 84 / Pseudo-Mercator (EPSG:3857); - WGS 84 (EPSG:4326); - SK-42; - PZ-90.11; - SK-95.
If the coordinate system selected from the list is divided into zones, the «Zone» combo box is activated, from which the corresponding zone should be selected. 2) From metadata file, you can select an XML file, in which the EPSG code and coordinates of geographic location are set.
After changing the coordinate system, you can return to the original system by clicking the «Reset» button. The units of measurement for the coordinates of the geographic location (meters or degrees) are set automatically in accordance with the selected coordinate system.
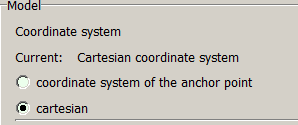
Model coordinate system:
For the loaded data, it is also possible to select the source coordinate system:
- coordinate system of the anchor point; - cartesian.
If the source model has been created in the 3D-editor and there is no information about its coordinate system, then the default item should be left: «Cartesian coordinate system».
Zoom levels for models:
It is possible to change the source range of zoom levels of the loaded model. The number of zoom levels cannot exceed the source one. Models from the COLLADA (DAE) and OBJ formats are loaded at the same scale level for the model file.
On the bookmark «Extra options» it is possible to customize the following properties of loaded model:
1) Calculate normals. It is available for COLLADA (DAE) format. When you enable the mode, the normals are calculated for each vertex of the model (is recommended), when disable, the normals are read from the source file.
2) Max level for normals. It is available for TLS format. It makes it possible to choose the zoom level of the model, after which the normals will not be calculated. To avoid the effect of a «rumpled» surface, it is recommended to set the level to 19.
3) Texture sizes by levels. It is available for COLLADA (DAE), OBJ and TLS format. The textures of the source model can only be reduced. For the COLLADA and OBJ formats, a natural number from 1 to 99 is set - in how many times to reduce the texture. For the TLS format, the numbers of powers of two are set - the texture size itself.
4) Altitude of model geographic location. It is available for all formats. Allows you to change the altitude of model geographic location.
5) Tile size. It is available for COLLADA (DAE) and OBJ format. The tile size of tile pyramid is set: 256, 512, 1024.
6) Modes of loading from COLLADA (DAE). The source model can be created with duplication of tops, in this case, using these modes, it is possible to reduce considerably the size a resulting file of model. However, deleting duplicate coordinates can affect both the appearance of the model and increasing the loading time, therefore the «Without geometry analysis» mode is selected by default (recommended).
User positioning of 3D-model
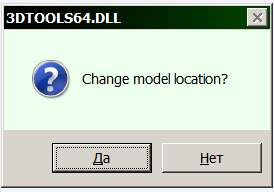
When importing a model from one COLLADA (DAE) file, in which the model geographic location is not set, it is possible to change its location and sizes on the map, for this you need to agree in the dialog that appears after the import process is completed:
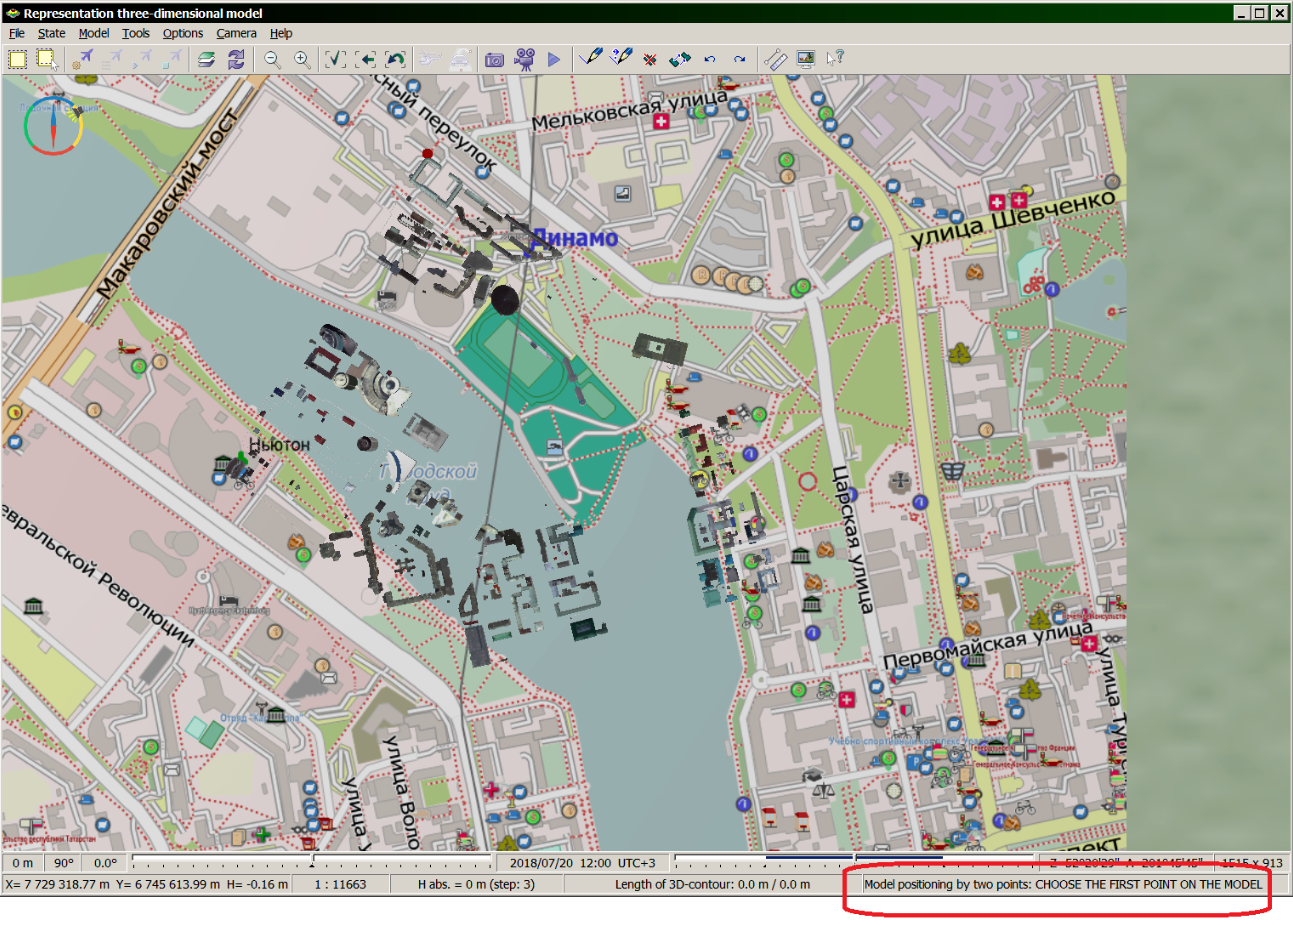
Then follow the instructions from the status bar of the main window «Representation three-dimensional model»:
1) Use the left mouse button to select the first point on the model. Point height can be regulated by keys PageUp/PageDown, value of height is displayed also in the status bar in the parameter Nabs. You can deselect the last point by pressing the Esc key.
2) Specify a point on the 3D map corresponding to the first selected point of the model.
3) Select the second point on the model.
4) Specify a point on the 3D map corresponding to the second selected point of the model.
5) To complete the selection of four points, hold down the Ctrl key and click the left mouse button.
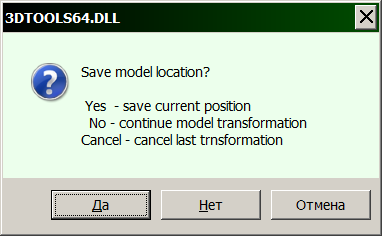
6) Upon completion of the process of importing the model into a new position, the following dialog will be displayed:
By clicking «Yes», the model will be written into the DB3D target file after the positioning is performed, by clicking «No» the model will be displayed in the source position and the positioning process will be restarted, by clicking «Cancel» the model will be saved in the starting position without taking into account the performed positioning.
Displaying the model after positioning:
|